Creating a Custom SMP Role for Password Disclosure - v. 7.1 SP1 MP1 and above
Purpose:
This article will explain the process of creating a Security Role with the minimum amount of permissions needed to view a managed password. (This is based off of the permissions found in Local Security Permissions for Viewing of Local User Passwords)
Steps:
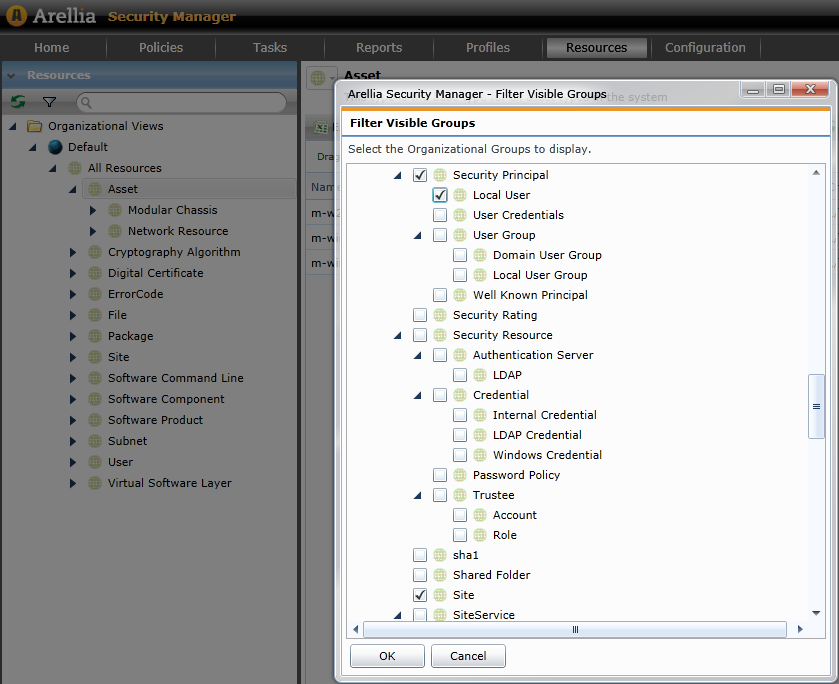
Allow the Local User resource to be displayed in the Arellia Console
- In the Arellia Console navigate to the Resources tab and click on the
 icon located at the top of the left hand pane
 - Scroll to "Security Principal" node (expand if necessary) and check the box next to "Local User"
Create the new Password Disclosure security role
- Open the Configuration tab and navigate to Settings -> Notification Server -> Account Management -> Roles
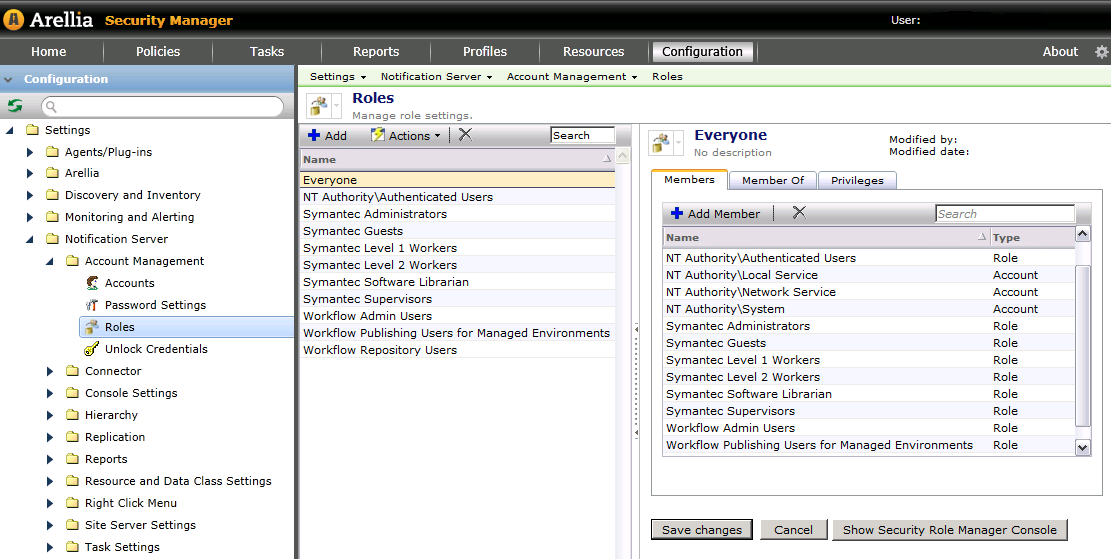
- Click the
 icon to add a new Security role, supply a name for the new password disclosure role and click OK
 - Open the Privileges tab for the new role
- Check "Show Managed Password" under the "Right Click Menu"
- Check "Show Managed User Password" under "Right Click Menu - Local Security"
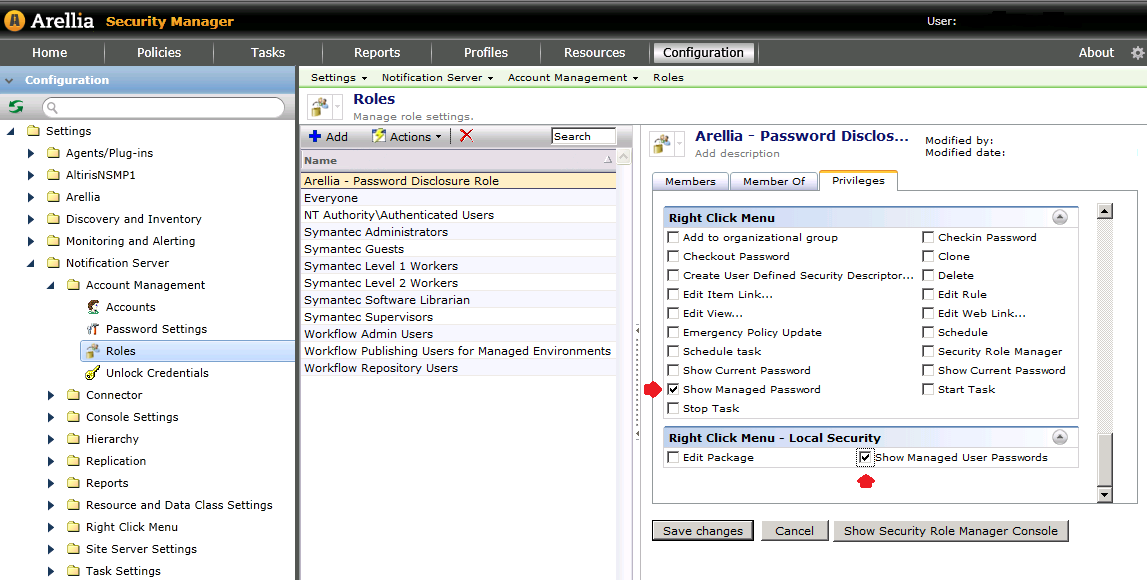
- Click on the "Save changes" button to commit the new Security role to the database
Configure the Security Role Manager
- Remain on the Role configuration page and click the "Show Security Role Manager Console" button
- Change the View to "All Items"
- Click the pencil icon directly under that drop down
- A new window will open with an item picker. Make sure the following nodes are checked:
- Resource Management > Organizational Views > Default > All Resources > Asset > Network Resource > Computer
- Resource Management > Organizational Views > Default > All Resources > Security Principal > Local User
- Resource Management > Organizational Views > Default > All Resources > User
- Settings > Arellia > Infrastructure > Password Disclosure Settings
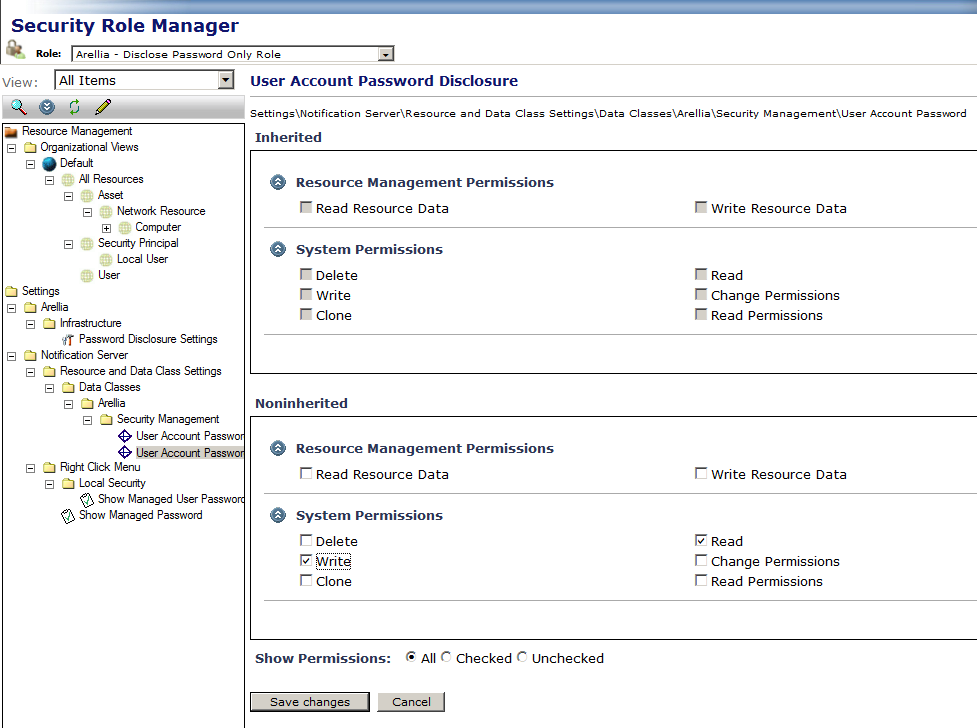
- Settings > Notification Server > Resource and Data Class Settings > Data Classes > Arellia > Security Management > User Account Password
- Settings > Notification Server > Resource and Data Class Settings > Data Classes > Arellia > Security Management > User Account Password Disclosure
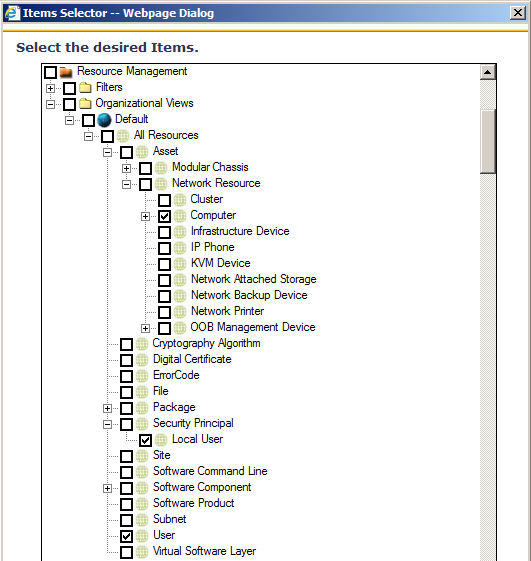
- Click OK to commit the changes to the database
- Select the "Local User" resource folder and add the "view password" permission
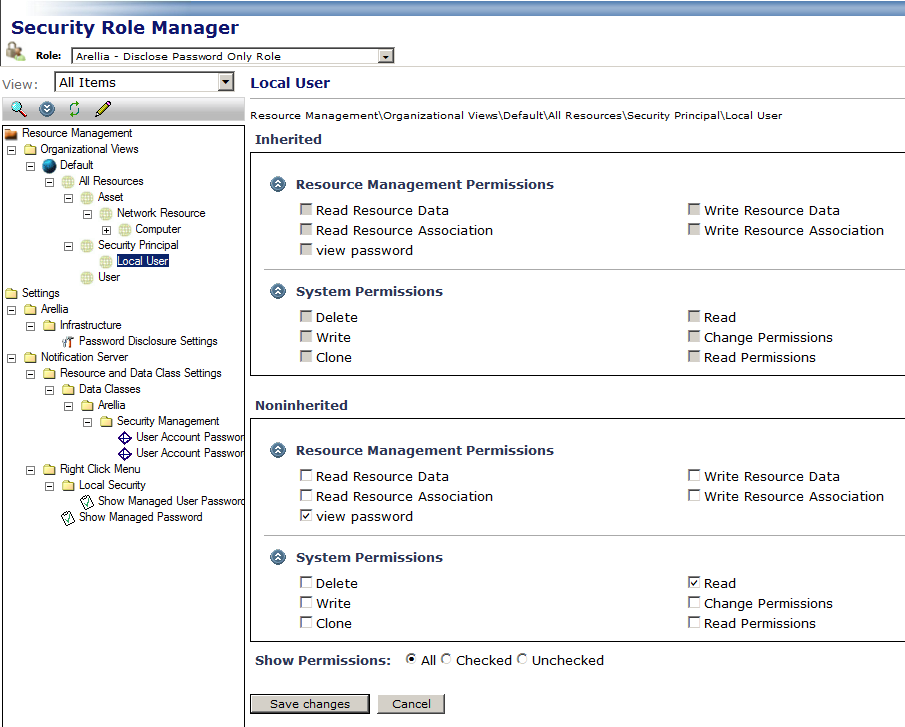
- Then give "Write" permissions to "User Account Password Disclosure" data class
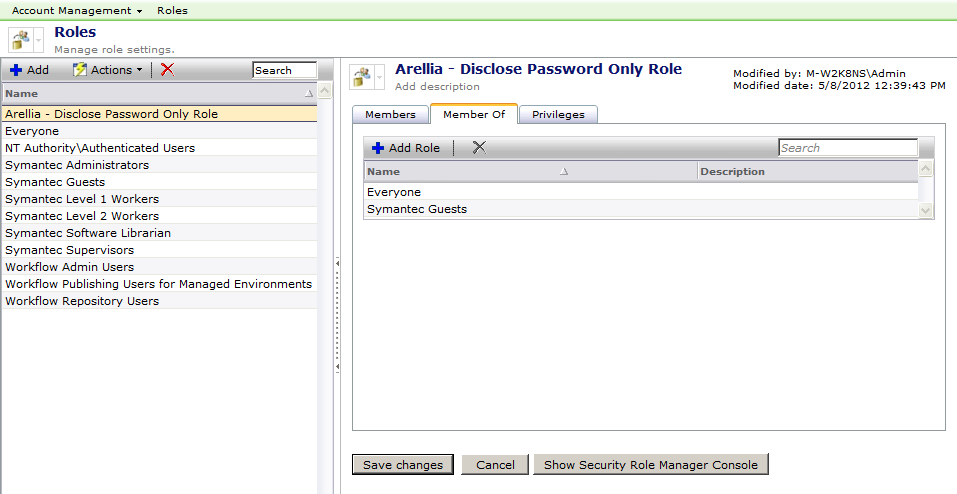
- Close out of the Security Role Manager Console after saving the changes. Add the new role as a member of the Symantec Guest role to enable basic Altiris console access. Alternatively it is possible to manually copy the permissions from the Symantec Guest role to the new password disclosure role.
- Save Changes
- Add your desired accounts and/or roles as members of the new disclosure role
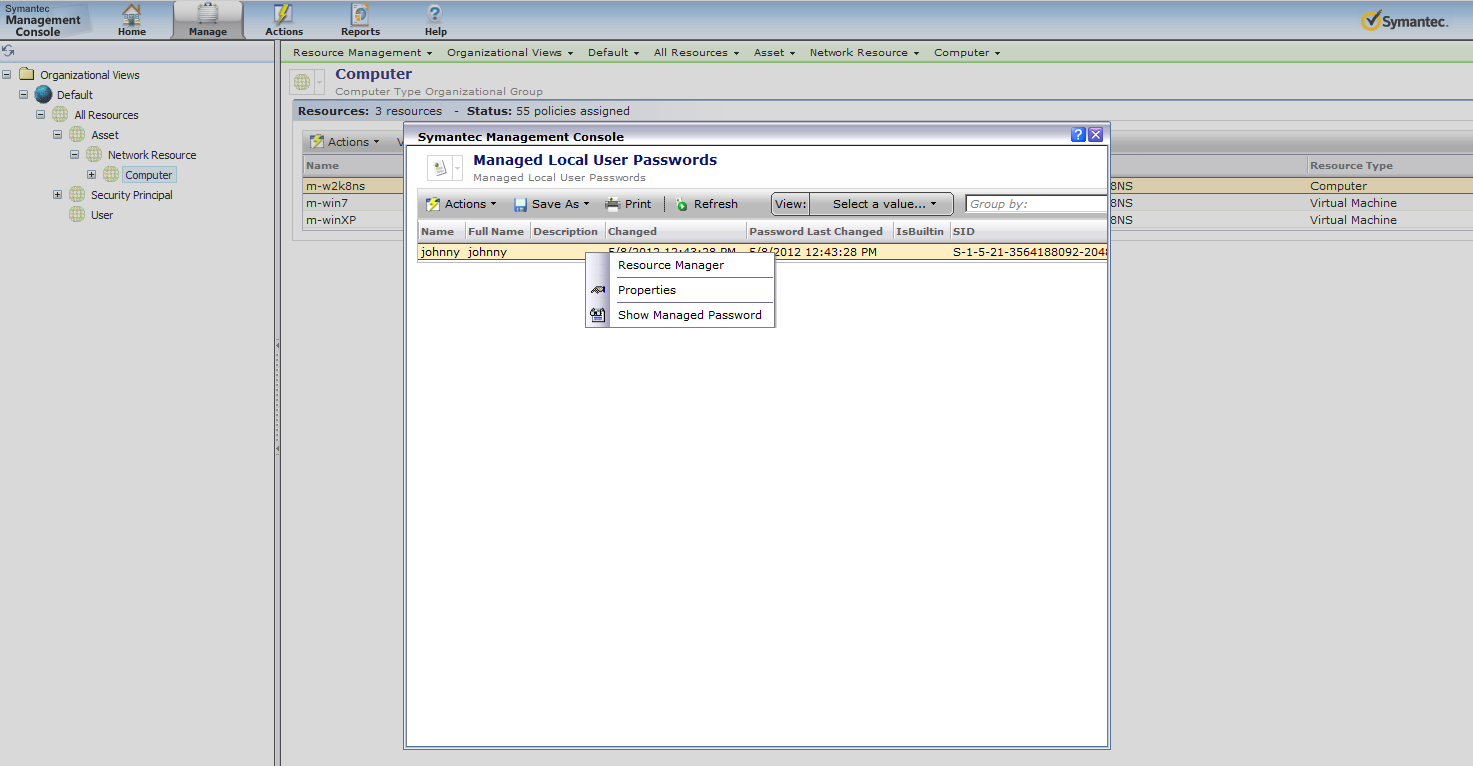
- These accounts will then be able to access the Altiris Console and disclose passwords by navigating to the Local User or Computer resource folders and using the right click content menu
- If you want to access password disclosure from the Arellia Console you will need to grant read access to the Resource Management root node. Please note that by granting read access to this root node the permission will be inherited by all child nodes, effectively granting read access to all resources types
Troubleshooting:
After clicking the "Show Managed Password" if a window pops up that has an orange circle running around in circles, verify that the permissions above (and found here: Local Security Permissions for Viewing of Local User Passwords) are correct and restart the web services (Arellia has most likely cached a security permission that will be reset when the web services are restarted). For more security caching information see: Arellia Security Permissions Caching