Creating a Custom SMP Role for access to Arellia Products Only
Purpose
This article will explain the process of creating a Security Role with the minimum amount of permissions needed to use the Arellia Console.
Steps
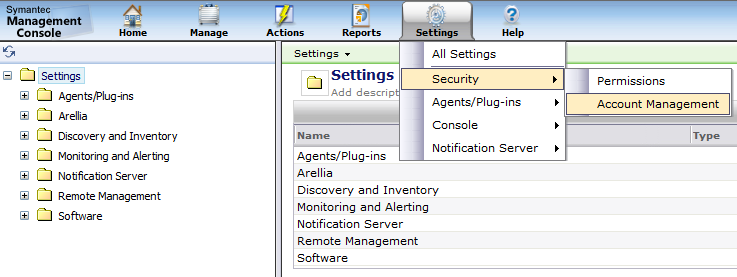
- Open up the Symantec Management Console and select Settings -> Security -> Account Management
- Select Roles
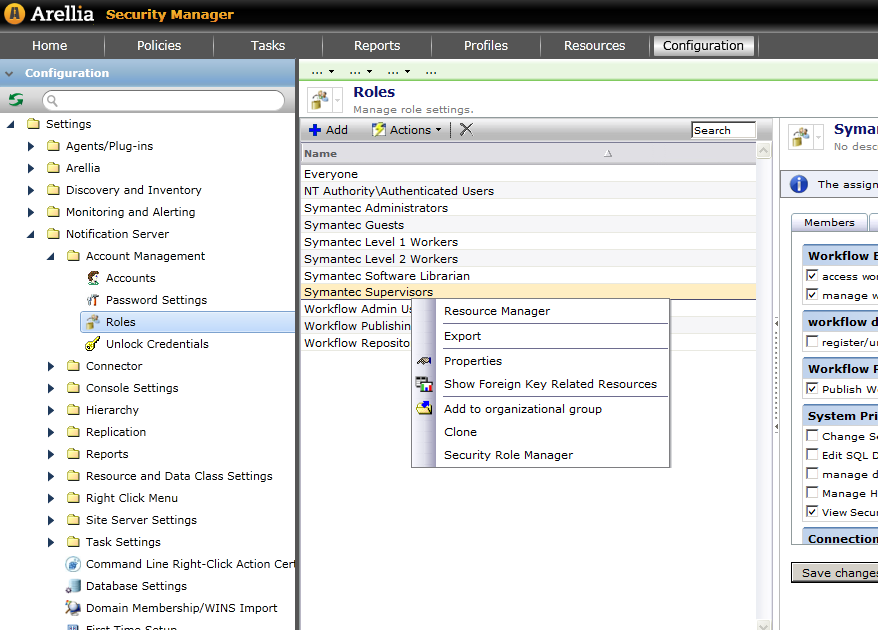
- Clone the Symantec Supervisors Role and Name it "Arellia Supervisors"
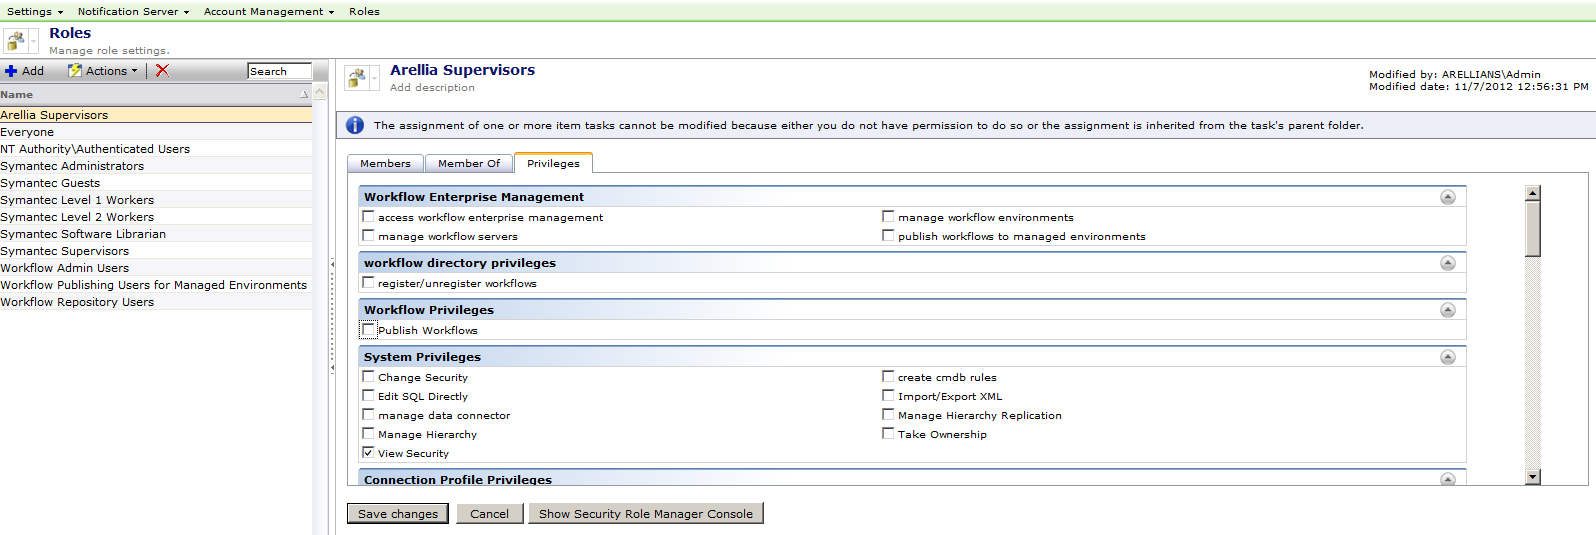
- Uncheck privileges for all non-Arellia solutions (eg. Workflow, pcAnywhere, Agentless Inventory, IT Analytics)
- Save Changes and click on "Show Security Role Manager Console"
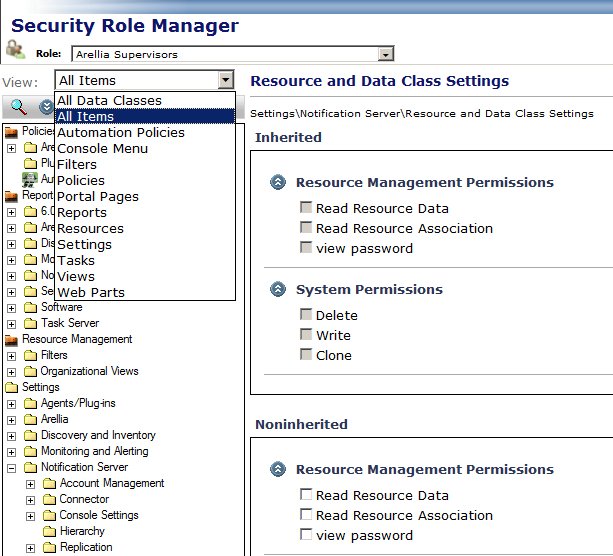
- Select "All Items" from the drop-down menu
- Select Policies and uncheck "Delete" and "Write" under System Permissions
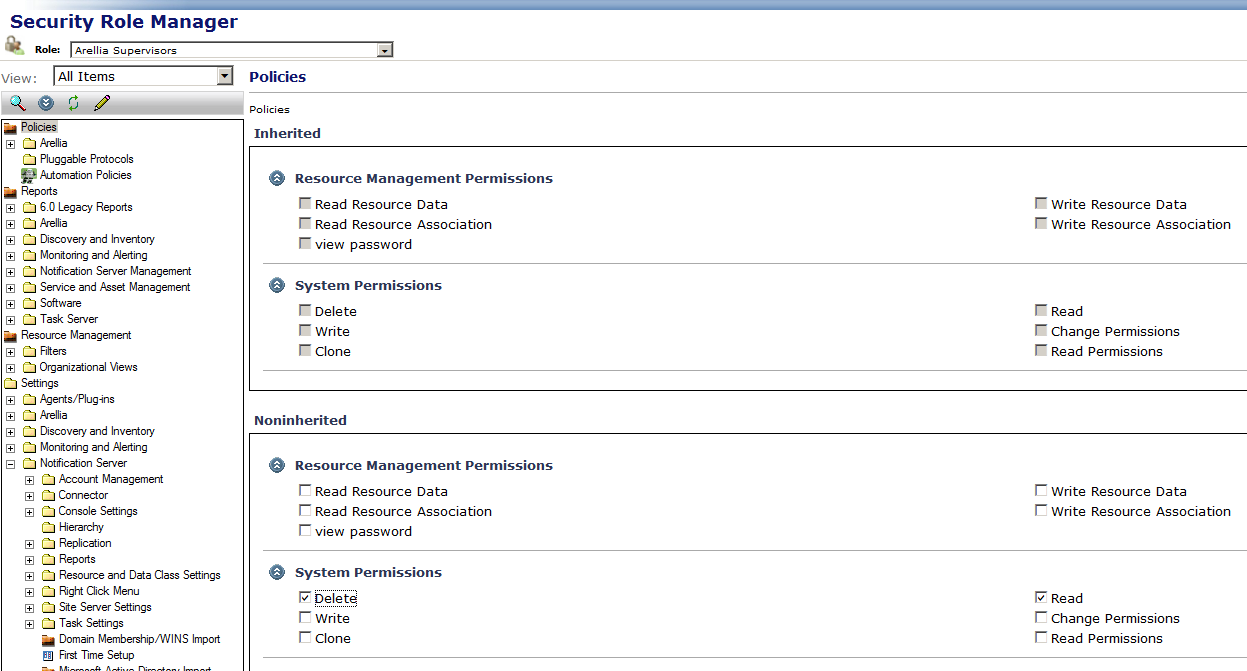
- Select Policies > Arellia and check "Delete", "Write", and "Clone" System Permissions
- Check all settings under "Policy Permissions"
- Check "Create Children" under Folder Permissions
- Select Reports and uncheck "Delete" and "Write" under System Permissions
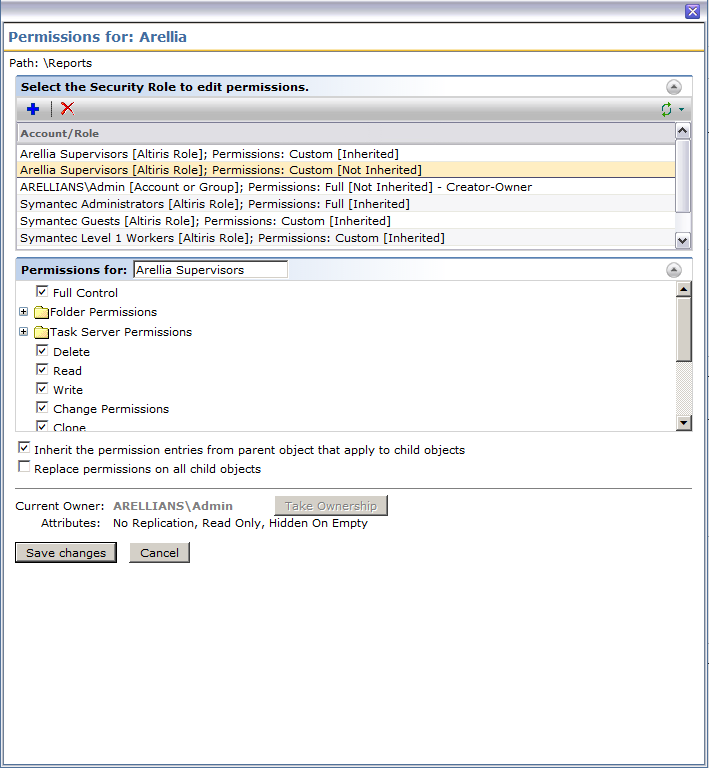
- Select Reports > Arellia and click on the "Advanced" button
- Select the blue add button and then select the "Arellia Supervisors" role and then press "Select"

- Select "Arellia Supervisors[Altiris Role]; Permissions Custom[Non-Inherited]"
- Enable Full Control and then Save Changes
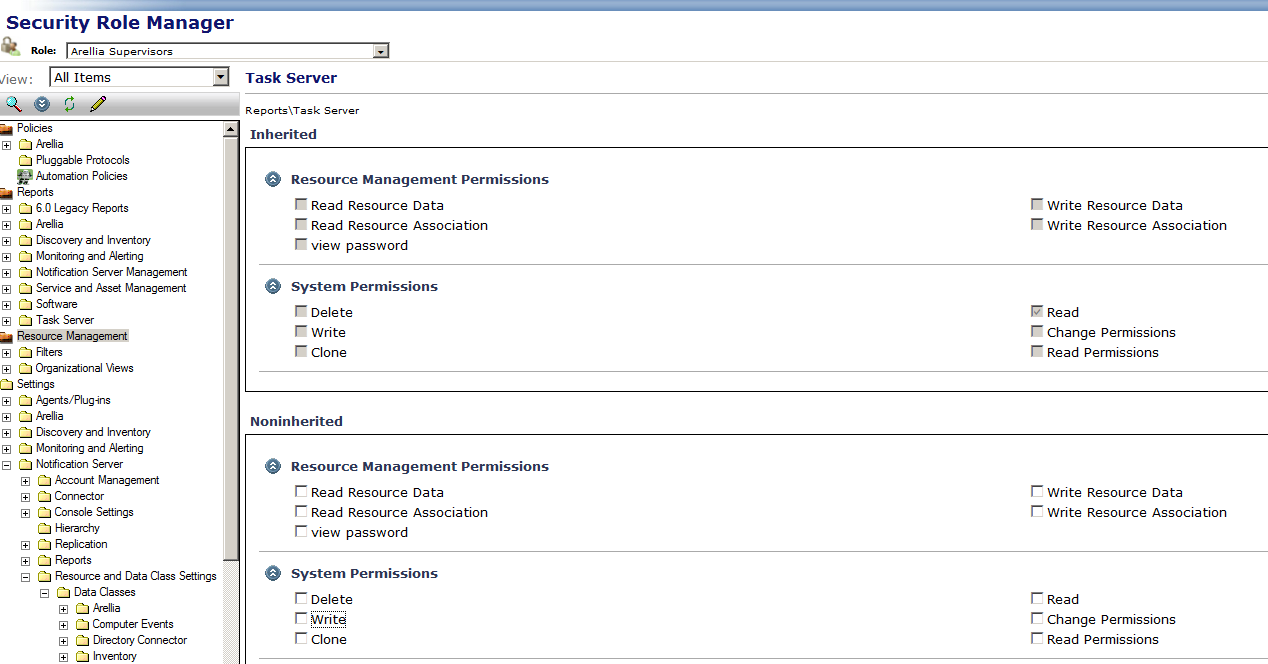
- Navigate to Resource Management and remove the "Write" System Permission
- Navigate to Resource Management > Filters > Arellia and add "Delete", "Write", and "Clone" System Permissions
- Add all Resource Management Permissions and then Save.
- Navigate to Settings and remove "Write" System Permissions
- Navigate to Settings > Agents/Plug-ins and Remove "Write" System Permissions
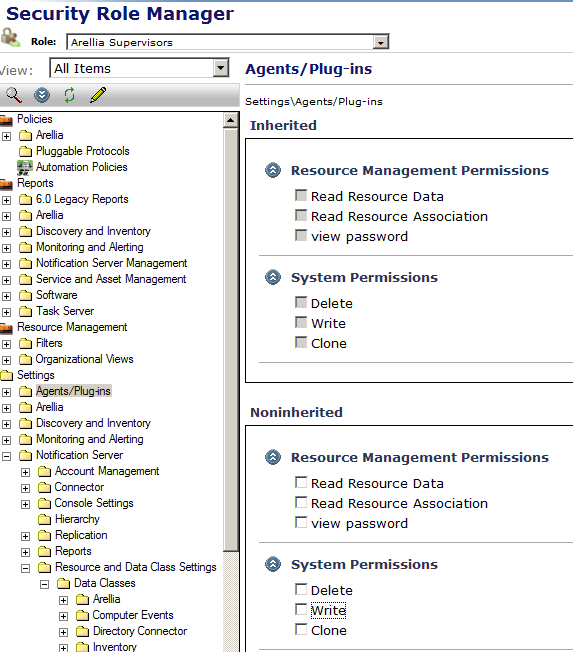
- Navigate to Settings > Agents/Plug-ins > Arellia
- Click Advanced and follow steps 13-15 to add Full Control for Arellia Supervisors

- Navigate to Settings > Arellia
- Click Advanced and follow steps 13-15 to add Full Control for Arellia Supervisors
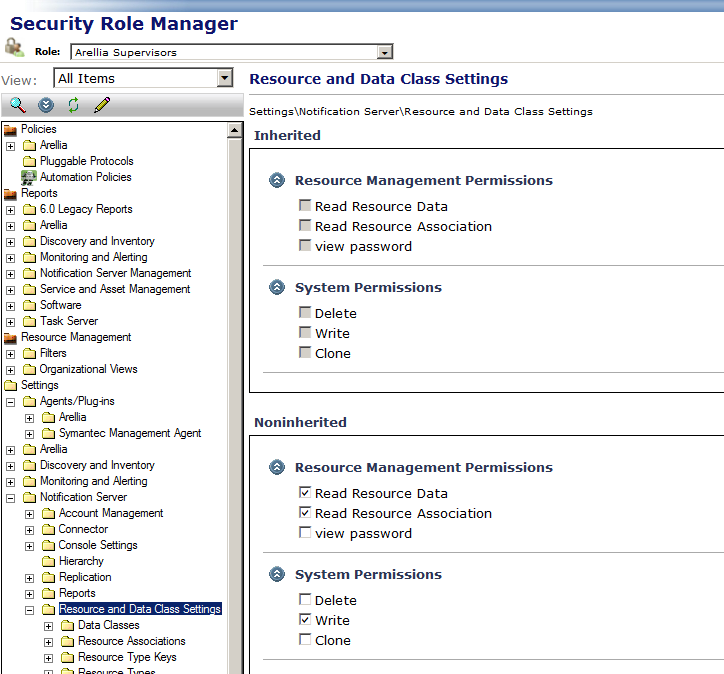
- Navigate to Settings > Notification Server > Resource and Data Class Settings
- Add "Read Resource Data" and "Read Resource Association" Resource Management Permissions
- Navigate to Tasks
- Remove "Delete" and "Write" System Permissions
- Navigate to Tasks > Jobs and Tasks > Arellia
- Click Advanced and follow steps 13-15 to add Full Control for Arellia Supervisors
The Arellia Supervisors custom role should now work correctly with all Arellia Products.